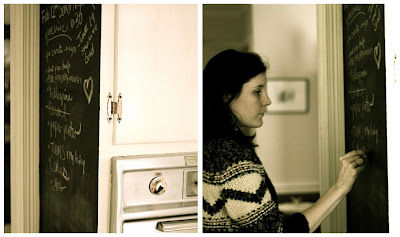
 With chalkboard paints becoming increasingly more available, it couldn't be easier to transform a small space, or large for that matter, into the inspiration board of your dreams. Tim and I have the perfect cranny of a wall space leading into the kitchen which we revamped into a full size chalkboard. It's been a life-saving hub for our grocery lists, reminders, dates to remember, random musings, and love notes.
This was a great weekend project that took about 3 hours total with a 24 hour drying period. Follow the steps below to bring new life and functionality to a space in your own dwelling.
 Materials:
- Chalkboard paint: local hardware or craft store
- Paint brush
- Paint roller
- Paint tray
- Painter's tape
- Newsprint or paint tarp
- Chalk
- Optional: damp rag, spackle, sandpaper
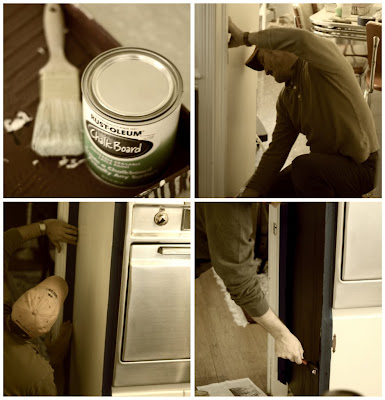
step 2: Apply painter's tape along edges of wall where you plan to paint in order to create border and protect neighboring walls.
step 3: Apply 2-3 generous coats chalkboard paint along edges of wall with paint brush. Allow each coat to completely dry before applying next coat (or follow drying instructions on paint canister).
step 4: Apply 2-3 generous coats chalkboard paint to body of wall with paint roller. Allow each coat to completely dry before applying next (or follow drying instructions on paint canister).
step 5: Wait 24 hours before writing on wall with chalk.
step 6: Enjoy your new-found organizational solution and design sense.


oh what a dreamy project you did! thanks for shearing!
ReplyDeletei want it, but have a little daughter and afraid of the chalk dust! :)
Amazing!
ReplyDeleteAw thanks! I completely understand about your daughter, but maybe when she gets older it could be a fun project for you to do together.
ReplyDeletei am sure she loves it! she loves all the painting stuffs and drawing!:)
ReplyDeleteNice Mary! The vintage-like quality of your photographs is lovely.
ReplyDeleteThanks so much Roxana, picnik.com is my dirty little secret. Feel free to try it out for your photos, it's completely free!
ReplyDeletewhat a great way to use your wall space. I had always thought about getting a dry erase board to write my to do list on. This is a much more creative and attractive then the dry erase board!
ReplyDeleteThanks Burnt Mill. Yes, better than a board, and an instant face-lift for an unused space. I hope you all will share some pics if you try it in your space!
ReplyDeleteGreat post thankks
ReplyDelete